The Linear Vibration Welding also known as a vibration friction welding machine, operates based on the principle of applying pressure to the workpieces being welded until the generated friction and shear heat cause the mating surfaces to reach a fully molten state. Once the molten film has formed and penetrated deep enough into the joint area, the relative motion stops, and the weld cools and solidifies under pressure. Below, vibration friction machine manufacturer Jfortune will introduce the process steps for a vibration friction machine.
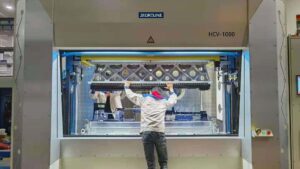
- Secure the product to be vibration friction welded onto the mold (tooling, fixture) and install the mold onto the vibration friction machine.
- After installing the mold, consult with skilled technicians to adjust various vibration parameters based on the welding requirements of the product. These parameters include mold vibration frequency, amplitude, duration, vibration direction, etc.
- Once the vibration parameters are properly adjusted, place the two separate components of the product into their corresponding upper and lower molds. Position the upper part of the product in the upper mold and the lower part in the lower mold.
- Press the dual start buttons to initiate the closing of the safety door. The vibration friction machine will generate vibration, causing the two separated product components to undergo vibration friction. When the temperature reaches the melting point and combined with applied pressure, the two separated components can be welded together.
- The welding time is approximately 15 seconds, but it may vary depending on the product requirements. Simultaneously, the left, right, rear, upper, and lower molds are separated, and the safety door opens.
- Manually remove the welded workpiece. The vibration friction welding process is complete.