Table of Contents
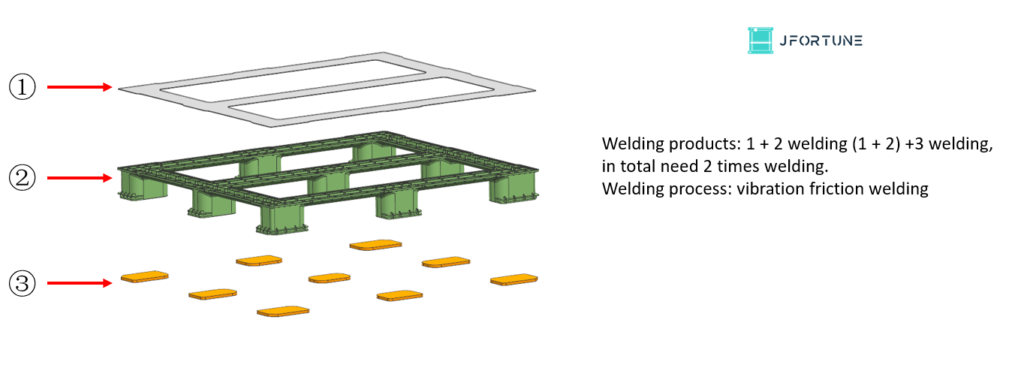
Toggle1. Product analysis
2. Analysis of key issues in product welding
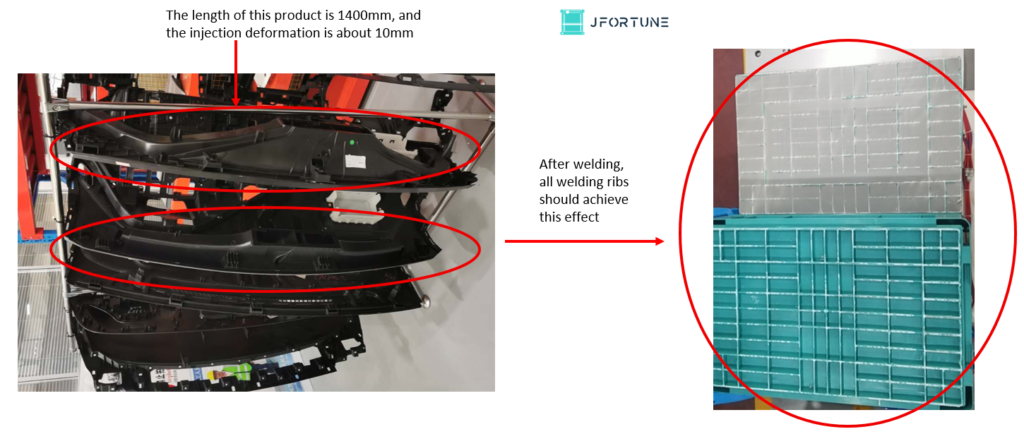
1) There is a large deformation of pallets, whether it will affect the welding depth inconsistently.
Vibration friction is that two products are tightly pressed when the lower table is running upward, and the upper vibration head drives the upper product to vibrate left and right, and the contact surfaces of the two products are welded by heat. (The pressing force of the two products is 20KN. The pressing force will correct the deformation of products before welding starts. The injection deformation of the product will not affect the welding quality of products.
3. Introduction of Automation Solution
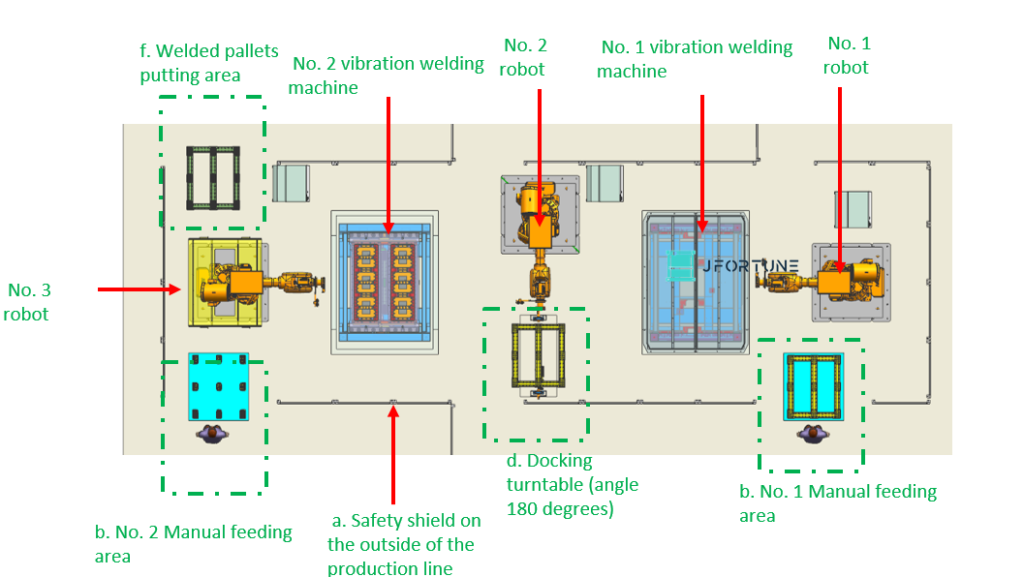
1). Equipment layout plan: a). Safety protection and isolation on the outside of the assembly line b). Manual feeding area
c). Robot load-and-unload parts d). No. 2 robot equip with intermediate docking turntable (angle 180 degrees) e). Vibration welding machine
f). Welded pallets putting area
4. Manual feeding area
Feeding area No. 1: Put the combined pallets of No. 1 and No. 2 onto the feeding area. A positioning module will be designed on
the area to accurately position the product and electric signal sensors to detect the feeding situation of the product.
Feeding area No. 2: Put the pallets of No. ③ onto the feeding area.
A positioning module will be designed on the area to accurately position the product and electric signal sensors to detect
the unloading situation of the product.
5. Description of safety protection and isolation outside the production line.
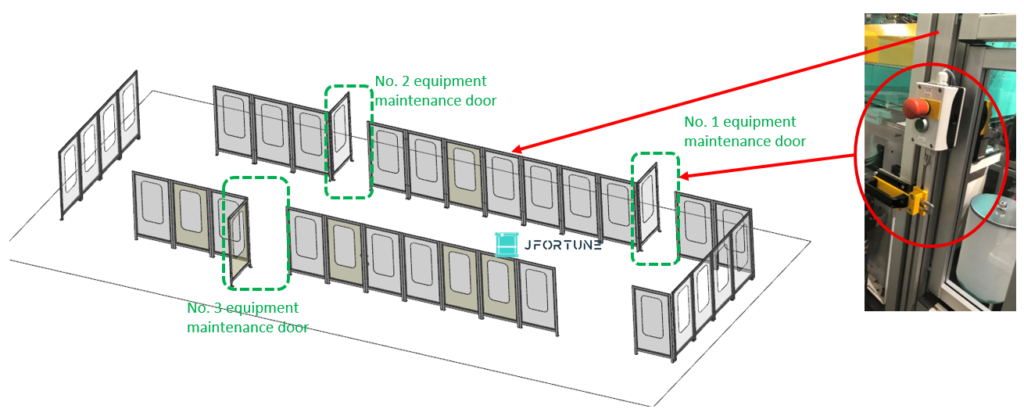
- Isolation protective cover function: Separate personnel from the operating equipment during the equipment’s operation, to prevent injuries caused by mechanical operation.
- Safety protection standard: Safety acceptance is carried out in accordance with CE standards.
- Production method: using aluminum alloy profile with transparent organic glass.
- Maintenance door: maintenance door design door lock and door opening safety switch (the equipment cannot run when the door is opened)
6. Robot loading and unloading
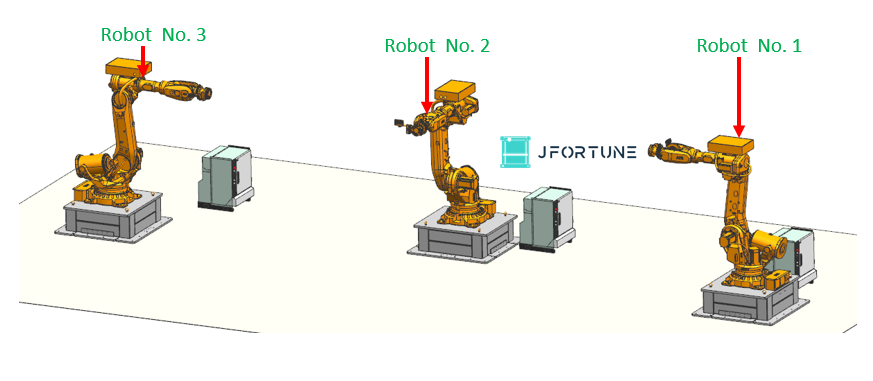
Robot No. 1 : ① + ② pallets are loaded and sent to No. 1 vibration welding machine. (Equipped with a set of plastic fixture)
Robot No. 2: Unload the pallet ① + ② that has been welded from the machine No. 1 and put it into the docking turntable.
Clamp the pallet ① + ② on the docking turntable and send them to the machine No. 2. (Equipped with a set of plastic fixture, A side and B side pallet will use the same fixture.)
Robot No. 3: Clamp the pallet No. ③ and send it to machine No. 2, and put the welded pallet onto the welded pallets putting area. (Equipped with a set of plastic fixture)
7. Description of automated welding process
- A. ① + ② pallets are manually put into the No. 1 manual feeding area (confirm by manual button + confirm by sensor detection)
- No.1 robot clamps the ① + ② pallet away from the feeding area.
- No.1 robot puts ① + ②pallets into the lower welding tool of No.1 vibration machine, the robot moves out of the equipment, the front soundproof door of No.1 machine is closed, and the product starts welding.
- After the welding is completed, the soundproof door on the rear side of the No. 1 machine is opened, and the No. 2 robot takes out the welded pallet ① + ② from the No. 1 machine.
- Robot No. 2 placed the ① + ② pallet on the rotating table, robot No. 2 was removed, and the rotating table rotated 180 degrees.
F.No. 2 robot clamp the ① + ② pallet from the rotating table.
- No. 2 robot sends the ① + ② pallet into No. 2 vibration machine, the robot moves out, and the front soundproof door of No. 2 machine is closed. The No. 4 robot clamps the ③ pallet onto the lower welding tool of the No. 2 machine. The rear soundproof door of the No. 2 machine is closed, and the product starts welding.
- No.3 robot takes out the products after welding ① + ② + ③.
- No.3 robot puts the welded products of ① + ② + ③ onto the welded pallets putting area

